Showing posts with label DIY tips. Show all posts

8.09.2010

Framing Hankies

Photobucket
Love this look! It's so charming. I need to find a spare wall in my house to do this...

5.18.2009

Before and After Armoire

Photobucket


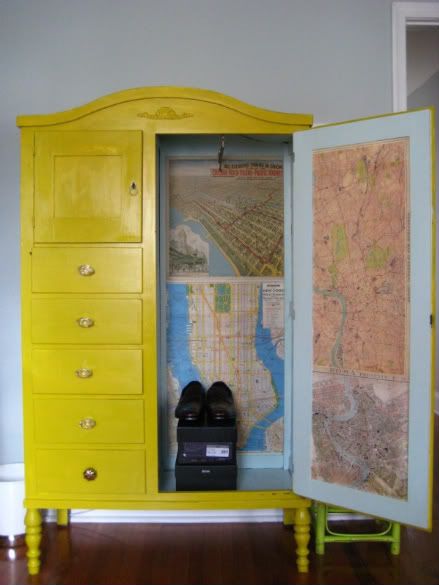
After a couple days of prepping and painting, we finally have the new armoire settled into its home in the master bedroom. As you can see, I went with a bold and sunny shade of yellow (Valspar's "Almond Puff" #3008-3A) in a nice semi-gloss finish. I don't have the proper drawer pulls on it yet, but otherwise it's pretty much complete. Here's a look at it's original, straight-from-Craigslist state...

Photobucket


Dirty and blah, right? But I knew the moment I saw the listing that it was the right piece for our bedroom. I was searching for a classic chiffrobe (with the closet on one side and drawers on the other) and this fit the bill. Also, I loved the curved top and the spindle legs, and knew the whole thing would look amazing with some TLC and a bright coat of paint. Oh, not to mention the $75 price tag... sold!

Now, when refurbishing this lovely piece, I didn't stop at the outside. The interior needed some loving too...

Photobucket

Seeing that I take up most of the closet space in the house, I wanted my fantastic boyfriend to be able to make use of the storage in this piece. So in order to make it slightly more masculine, I lined the interior of the closet with vintage map prints from Cavallini (though I'm thinking this would have been an even better choice) and painted the remainder of the wood trim in Martha Stewart's aqua-hued "Vintage Map" (#MS 337, also in acrylic semi-gloss).

Photobucket


Lining the walls was super easy. I simply measured the area I wanted to cover and cut the paper to size. Then after carefully applying a coat of spray adhesive to the area, I applied the paper and smoothed it down until it had completely adhered. $12 worth of decorative wrapping paper can really do wonders, don't you think? And now, Kevin has a worthy home for his gorgeous and pristine new Prada penny loafers (yet another wonderful NM Last Call find!)
Photobucket


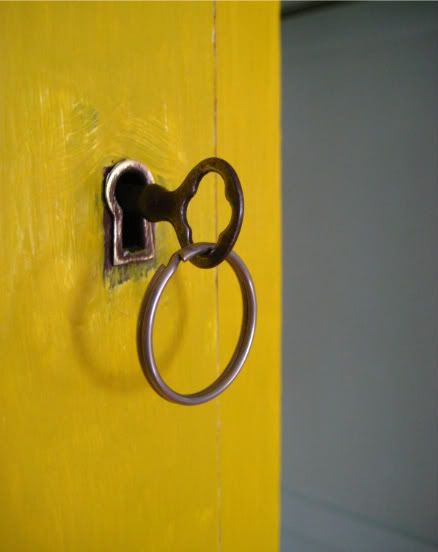
The chiffrobe has some wonderful little details. This close-up shows the lock and key that adorns the sweater cubby. This also allows me to show a better example of the paint job. I started out by sanding the rough spots, followed by applying two coats of an acrylic all-purpose primer to the entire piece. Once the coats had dried, I applied 2 coats of the yellow semi-gloss. There were challenges in this process though. I found that the yellow paint was not taking well to the surface, even with the thorough primer coats. There was running and dripping and the coverage was not coming out even. So, instead of re-sanding and re-painting the whole piece, I decided to go along with the imperfections and play them up! Using small pieces of sand paper, I roughed up the surface and corners to give it an intentionally weathered look. After 30 minutes of random sanding, I had a finished look that was just enough "vintage" without veering into Shabby Chic territory (I hope!)
Photobucket


And so, another project checked off the list! I am very excited for us to have this extra storage - hopefully the bedroom will be much tidier, and more cheery, because of it!

5.04.2009

Paint by Numbers

Photobucket

I often get questions about the how-to's of using paint to spruce up furniture and objects. As spring is here and all of us are seem to be eager to freshen up our houses, I thought I would share some tips and pointers for (relatively) fool-proof painting...

1. It's all about the finish. Spray paint (as well as the regular brush kind) works like a champ on metal, resin, plastic and unfinished wood without sanding and priming. Just make sure the surface is free of dirt and dust, then spray away!

2. Watch out for highly varnished wood and metal. Super shiny finishes don't take paint as well, and usually require the advanced prep work of sanding and priming.

3. Spray paint works best on items with lots of nooks and crannies (such as a chair frame or a dog sculpture) or ones that require a super-smooth service (like metals). But break out the pail and brush for larger objects or ones that have wide flat surfaces (like a flower planter).

4. Acrylics work fine for most standard household projects. I love high-gloss acrylics for covering objects and furniture, but sometimes a matte surface is called for, like on this light fixture.

5. You can paint your stuff in the house if you are using a brush. Just make sure to put down newspapers or a drop cloth. (See how neat and tidy the kitty is above!)

6. Spray painting, on the other hand, requires a well-ventilated space where you can get a little messy. In other words, DO YOUR SPRAY-PAINTING OUTSIDE! Spray paint can blow around and leave teeny-tiny droplets all over the place. You may not even notice until after you pull your newspapers up and realize the floor or counter surrounding it has changed color.

7. Another idea for mess-free spraying is to use a folded piece of cardboard to create a shield. Use the shield behind the item you are painting to contain the droplets!

8. If you are using a brush, make sure you have the right tools to make it perfect. I usually have a couple brushes in different sizes for getting large spots and small. Sometimes a sponge brush (it's basically a sponge on a stick) is good for pushing into spots your bristles won't reach. And don't forget the painter's tape for getting clean lines and protecting hardware!

9. Use a light hand, and keep it moving, when you use spray paint. You want to apply thin, even layers. You may have to go over the entire piece 5-6 times to get it perfectly covered, but don't worry, you only have to wait a minute or two between layers.

10. Finally, make sure your item is completely dry before moving. You don't want to mess up your handiwork by being impatient!


Bonus Tip:

Please be thoughtful and extremely careful when painting something that is expensive or personally valuable to you. You can be more cavalier when spraying a resin pineapple bookend from the thrift store, less so when you are refurbishing your grandmother's dining room table.