Showing posts with label before and after. Show all posts

11.18.2010

a touch of chevron

Photobucket

You know how it is when you look around a room and just think something is missing. I had been feeling that way about my master bedroom for a while. The walls were painted, I had new bed linens, a playful picture collage and a newly upholstered pink velvet bench under the window. There's color and pattern everywhere - why does it feel imcomplete? And then I looked at the windows. They were so plain! And that's when I decided that I needed bold pattern on the curtains to bring everything together. A black and white chevron print was my dream, but the idea of sourcing fabric and having full length drapes sewn seemed like way too much money and time. I wanted that burst of pattern right away! So off to Ikea, for two sets of the Lenda curtain in bleached cotton ($14.99 per pair!!) Another stop at Lowe's yielded a quart of semi-gloss acrylic black paint and one 4-inch trim roller. Back at home, I threw a drop cloth down on the living room floor, laid the first curtain panel on it (careful to smooth out all the wrinkles), and then started zig-zagging away. Several hours later, plus some drying time, and voila!, DIY chevron curtains! I like that the pattern looks rough and imperfect - that was part of the goal. Intentionally imperfect looks way better than something that tries to be perfect and fails, don't you think? So let me know what you think - did this project complete the room?
Photobucket
Photobucket
Photobucket
Photobucket
And in case your curious, here's my (much more glamorous!) inspiration:


Photobucket

I just need to upgrade to a fur throw, get rid of my old-fashioned tv (on which I watch Friday Night Lights dvds while I'm getting dressed, thank you very much), get a sparkly light fixture and a lucite chair, and generally add a dose of SPARKLE! I'm glad I still have projects to work on...

(Last image via Anne Coyle Interiors)

6.09.2009

Colorful Gardening


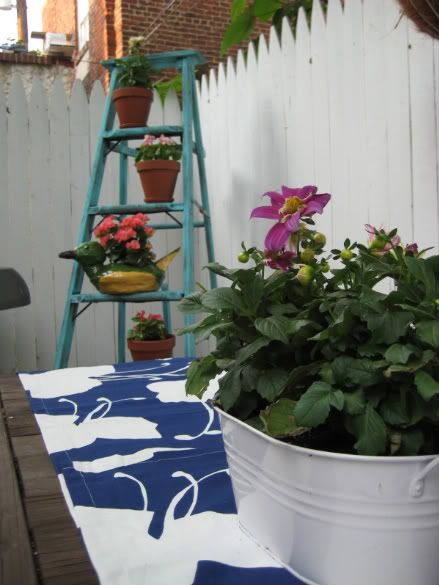
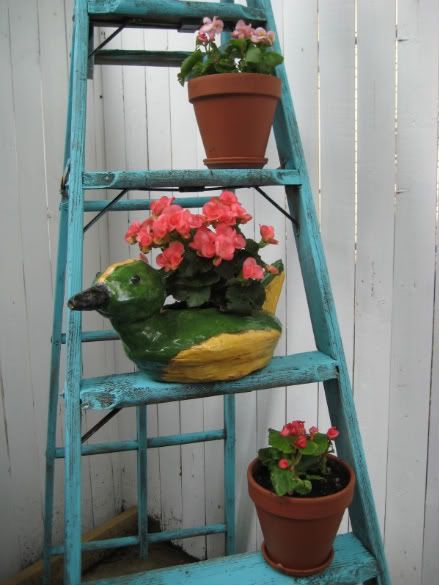
Progress continues to be made in my patio area. After completing the tiered veggie garden, the focus has been on just making things pretty. My most recent mini project is this ladder plant stand. I like having something tall to create a bit of a focal point - and it's certainly nice having another spot to perch flower pots. The idea came from this post over at Bits & Pieces... as soon as I saw it the light bulb went on! Turns out we had an rickety, old ladder sitting in our basement just perfect for refurbishing. With a single, rough coat of leftover turquoise paint from my laundry room project to give it an appropriately weathered look, I had a fun, no-cost piece of garden decor! 

Here are a view more shots from around the garden...


The duck planter was an 8th grade art project of my sweetie's... how cute is that?


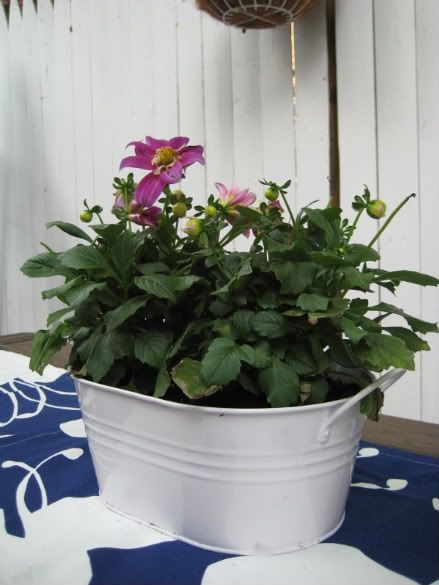
The miniature metal wash bucket is a $2 Target find from the bargain bin at the front of the store. So perfect as a planter! Now I can't wait for the dahlias to really start blooming...


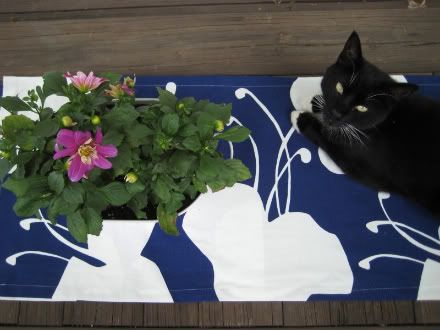
Here's my sneaky little Radius, posing as usual. And the table runner is only $3.99 at Ikea - you'll need two to make it across the table though...


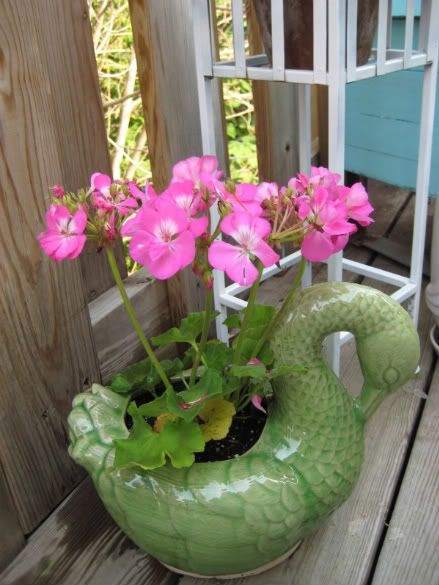
A final addition to our upstairs deck - a graceful swan planter from the sale room at Anthro!

5.04.2009

Paint by Numbers

Photobucket

I often get questions about the how-to's of using paint to spruce up furniture and objects. As spring is here and all of us are seem to be eager to freshen up our houses, I thought I would share some tips and pointers for (relatively) fool-proof painting...

1. It's all about the finish. Spray paint (as well as the regular brush kind) works like a champ on metal, resin, plastic and unfinished wood without sanding and priming. Just make sure the surface is free of dirt and dust, then spray away!

2. Watch out for highly varnished wood and metal. Super shiny finishes don't take paint as well, and usually require the advanced prep work of sanding and priming.

3. Spray paint works best on items with lots of nooks and crannies (such as a chair frame or a dog sculpture) or ones that require a super-smooth service (like metals). But break out the pail and brush for larger objects or ones that have wide flat surfaces (like a flower planter).

4. Acrylics work fine for most standard household projects. I love high-gloss acrylics for covering objects and furniture, but sometimes a matte surface is called for, like on this light fixture.

5. You can paint your stuff in the house if you are using a brush. Just make sure to put down newspapers or a drop cloth. (See how neat and tidy the kitty is above!)

6. Spray painting, on the other hand, requires a well-ventilated space where you can get a little messy. In other words, DO YOUR SPRAY-PAINTING OUTSIDE! Spray paint can blow around and leave teeny-tiny droplets all over the place. You may not even notice until after you pull your newspapers up and realize the floor or counter surrounding it has changed color.

7. Another idea for mess-free spraying is to use a folded piece of cardboard to create a shield. Use the shield behind the item you are painting to contain the droplets!

8. If you are using a brush, make sure you have the right tools to make it perfect. I usually have a couple brushes in different sizes for getting large spots and small. Sometimes a sponge brush (it's basically a sponge on a stick) is good for pushing into spots your bristles won't reach. And don't forget the painter's tape for getting clean lines and protecting hardware!

9. Use a light hand, and keep it moving, when you use spray paint. You want to apply thin, even layers. You may have to go over the entire piece 5-6 times to get it perfectly covered, but don't worry, you only have to wait a minute or two between layers.

10. Finally, make sure your item is completely dry before moving. You don't want to mess up your handiwork by being impatient!


Bonus Tip:

Please be thoughtful and extremely careful when painting something that is expensive or personally valuable to you. You can be more cavalier when spraying a resin pineapple bookend from the thrift store, less so when you are refurbishing your grandmother's dining room table.

4.27.2009

My Weekend Outdoor Project

Photobucket

I hope you all had a great weekend! It was sunny and hot here in Philadelphia, which gave me the incentive I needed to start on the patio and deck. Most of my time was spent painting the patio fence, which went from a drab untreated wood finish to a bright white. But more on that later, once I can get some good photographs.

A much easier project involved sprucing up our third floor deck. It's a small space, but a perfect one for my fella and I to sit, have a cocktail, and enjoy the city skyline. We purchased the Ikea andirondack chairs last summer, along with the colorful striped cushions, though they do have similar styles this year too.

Photobucket

I started out by painting the Ikea planter that I've had for years and years. I blended the leftover white paint from the patio fence with a touch of turquoise paint (Valspar "Bayside") that was used on the new laundry room walls to create a dreamy aqua. The little iron plant stand was found on the street in a set of three (the other two are downstairs) - I quickly coated it with white gloss spray paint to freshen it up. Then I filled the pots with white begonias and pink petunias!

Because the deck can be viewed through a French glass door at the top of our staircase, I wanted to add some playful touches that would be fun to look at all summer. So I dragged out some fun accessories to give the space life - the chrome lanterns are from West Elm and the ceramic owl planter is from Anthropologie.

Photobucket

And so, with a cool drink in a pear-print Orla Kiely tumbler (they finally re-stocked my local Target with all the Orla kitchenware!) and Sammy the greyhound by my side, the deck is finally ready for summer living!

So, were any of you lucky enough to spend time in the sun this weekend? If so, what did you do?

4.21.2009

The New Chandelier

Photobucket

Like I mentioned yesterday, we finally hung the chandelier that I refurbished last month! I originally found it on Craigslist for $40 - it was brass and had white candle covers with fake dripping wax. Egads. But a coat of matte white spray paint brightened it up, and I created candle covers using decorative paper by Snow & Graham.

Making the candle covers was so easy! Simply purchase replacement cover tubes from a place like this (they cost around $1 each), cut your paper to size, brush adhesive onto the tube, and then place the paper carefully around the tube and smooth down. Easy as that! I think I might make a second set for my chandelier, so I can change things up from time to time.

Photobucket

The chandelier is currently residing in our third floor hallway, next to the entrance to the deck. I like that it's in a slightly unexpected place, instead of over a table or counter. Once the rest of the space is fixed up (I'm repainting the walls and adding some new pictures), I'll share some more...

3.09.2009

Weekend Project

Photobucket
Hope you all had a great weekend! As for me, I spent a good part of the time refurbishing that old brass chandelier I mentioned last week. You can see a little preview of the finished product above! In addition to painting it white, I performed a bit of DIY on the candle sleeves. While the replacement sleeves offered by this company are very cool indeed, I decided to save about $70 by making them myself.  I'll share more photos in upcoming days once we decide where to hang the thing, and I also promise to include a little tutorial for covering your own candle sleeves!

2.20.2009

Wallpaper Project on Apartment Therapy


Wow! Thanks so much to Beth over at Apartment Therapy for featuring my before-and-after wall project! I'm super flattered that they liked the results of my adventure in bargain wallpaper. Check out the AT post here...

1.20.2009

House Changes


I completely rearranged the master bedroom today. The bed is now situated between the windows to create some symmetry in the room, while the marlin gets to have the south-facing wall all to itself.  I need to do some accessorizing still, and I'm working on a picture wall for the other side of the room. More on that once I get frames for my new prints...

1.06.2009

Bookshelf Project, Part 1


As I mentioned yesterday, Kevin and I picked up a new (to us) bookshelf for the living room. We found it at a fantastic antique/junk shop near Atlantic City called Cobweb Corner. They had some knock-out Hollywood Regency pieces, and for such reasonable prices. But we came home with only the simple bookcase, which was chosen for the narrow shape, interesting details, and bargain price tag. It started out a medium brown-toned wood, which was immediately painted a glossy white. I really like the little arches at the top...


I wanted to do a fun wallpaper lining, but made the choice to take the easier (but no less stylish) route and use gift wrap instead. This pattern is "Madame Butterfly" from Whimsy Press (it's 100% recycled too)...


Luckily the sheets of paper were almost exactly the correct width for my shelves, so there was a minimum of cutting involved.  A quick coating of spray craft adhesive holds everything in place...


And finally, almost complete. I just need to paint the little drawer that goes in at the bottom, and of course, fill it up with stuff...


In Part II, I will show the completed piece!

12.01.2008

Corners of my House

I finished wallpapering my powder room the other day and thought I would share the results. For now, I've added a small shelf to hold flowers and an assortment of some of my favorite blue figurines...

I've also been putting the final touches on other corners of my house.  In the guest bedroom/office, I finally found some great shams for the bed at Anthropologie...


And I completed my desk set-up after a trip to the Container Store and the Apple store...


In the master bath, I've potted a few plants and added a rolling cart...


And in the kitchen I've added this little vignette... 

11.24.2008

Wallpaper - In Progress


I'm in the midst of wallpapering my powder room, and it's been quite a project so far!  (The paper is really pretty, isn't it?!  I love the metallic silver background...)  I've never wallpapered before, so it has been a lot of trial and error.  Still, I think it's coming out pretty good.  That's Radius, above, admiring my handiwork...

10.23.2008

Jewelry Cabinet... Finished!


I've always wanted some kind of special showcase to hold my jewelry.  It seems like a shame to buy something pretty and then stick it in a drawer or box where you can't see it.  Half the time I forget what's in those drawers and boxes and end up wearing the same pieces over and over.  So I was thrilled when I found this jewelry curio a few days ago.  Still, it needed implements inside the box on which to hold the jewelry, so I had myself a little crafting afternoon.  The idea was tree branches, but instead of, say, spray painting some manzanita branches, I decided to make the branches and cover them in sweet printed fabrics.  


Here's the close-up of the tree with the door open.  I wanted it to look a little rough around the edges so it would have more of a vintage look, so I ripped the fabric into skinny strips and let the fringe show.  In addition to the main tree, I created individual branches in contrasting fabrics that are attached from the top of the box and descend into the interior. I also made a little rock for attaching pins, like my fun little bakelite parrot.

The way I went about making the tree form was by using armature wire, a very soft, bendable wire that is used in sculpture and can be found at art supply stores.  I simply bended it into the shape I was going for and made sure I created a little base that would allow it to stand.  In this case, bending the bottom into a tripod shape worked perfectly.


Once the shape was right, I started wrapping it with the strips of fabric, using hot glue to hold it secure at various spots.

The finished tree only took about an hour.   I think something like this would be cute sitting by itself on a dresser too.  And the same idea could even work with real branches wrapped in fabric or ribbon and placed in a vase.  Hmm, maybe I have another project to take on!

9.29.2008

House Update - My New Office


Now that I am working from home, Kevin and I decided that it would be nice if I had my own office to work from. We already have a room set up as an "office," but for all practical purposes it serves as a music/media room. So last week, we created a desk space in the guest bedroom. It's perfect for me - the room gets lots of sunlight and I can make it as girly as I like. There is still more to be done - I need additional containers and file boxes, and I still don't have the shelves arranged quite the way I want - but it's getting there...